Table of contents
No headings in the article.
Steps:
Create a free tier Rds Database in Amazon selecting the Database engine as MySql.
Give an appropriate ID and password to the database.
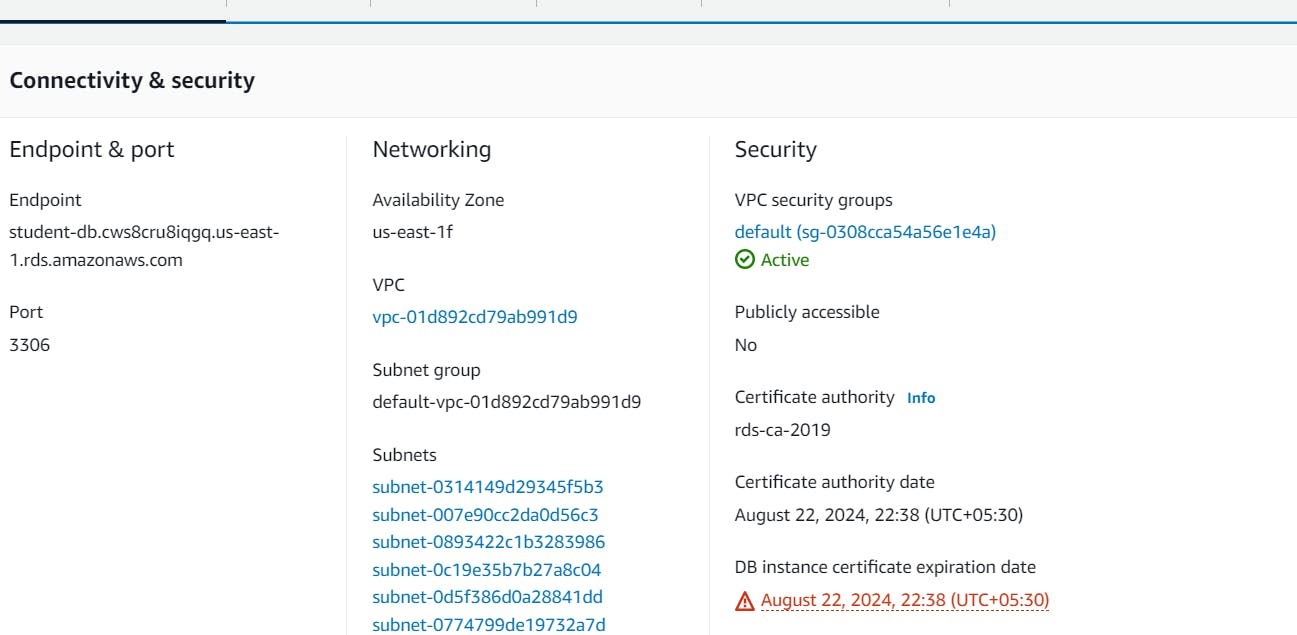
Now go to the Amazon Ec2 services and create an instance and then give the default VPC and Security as Above given to the RDS (So that the Port numbers later should be the same on both the end of the services).
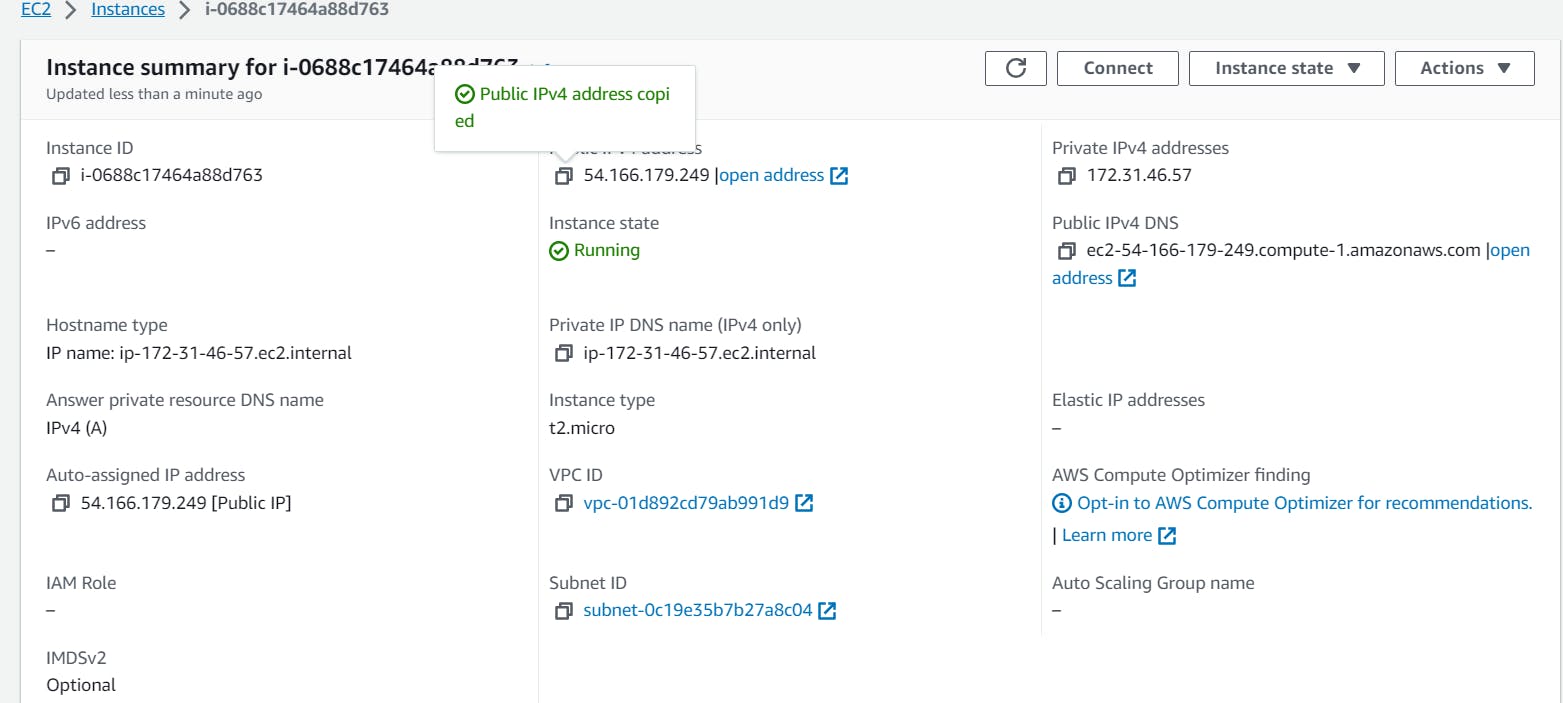
Now after this our step will be to connect the instance through ssh or cloudshell as you want and the steps here we are going to perform are as follows.

Now perform the following commands as: #yum install java openjdk -y
#yum install mysql -y
Here we are installing mysql to connect the rds database with the help of a respective port (3306) As given in the security group of both the services RDS &EC2.
Now we have to install a tar file for the tomcat version we want to run the application , As our application supports Tomcat as a website hoster.
Note: (Install the Version 8.5.93 of Tomcat thats the most compatible version for our APP)
Link for the version : https://dlcdn.apache.org/tomcat/tomcat-8/v8.5.93/bin/apache-tomcat-8.5.93.tar.gz
Copy this Link and then extract as its a Zip file, the command for this is
#tar -xzf apache-tomcat-8.5.93.tar.gz -C /opt/
We will copy and Extract this to the /opt directory as its a external Package.
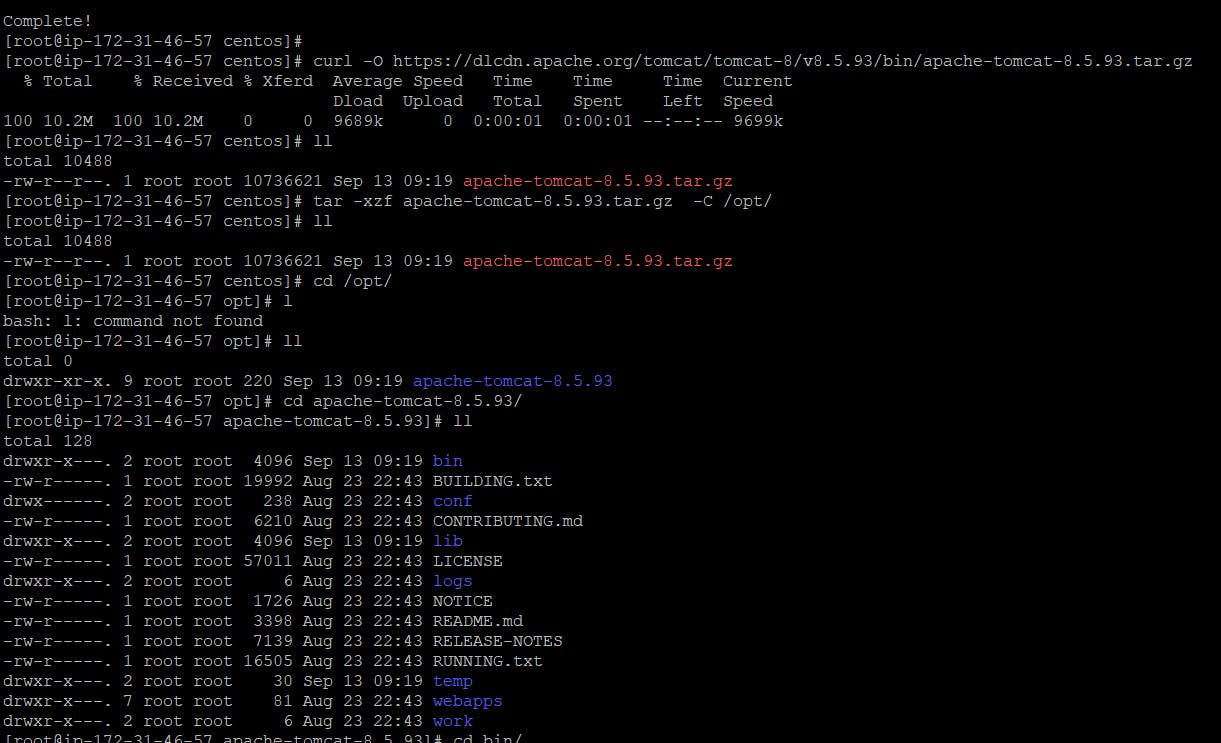
As you can see in the above image we have successfully extracted and now we have to do it start the tomcat
by the command #bin/catalina.sh start (As its a script to run the catalina.sh command)
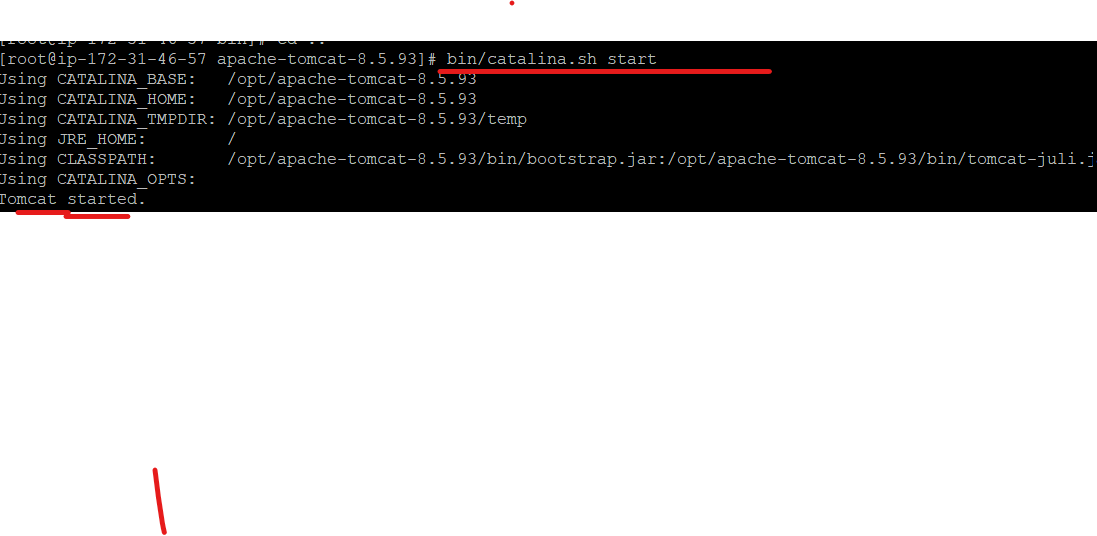
Now what we have to do is Add the port number in the inbound rule of Security group of the instance as 8080
Note: This is default port for tomcat.
Now take the public IP and just add :8080 and press enter you can see that Tomcat is Live

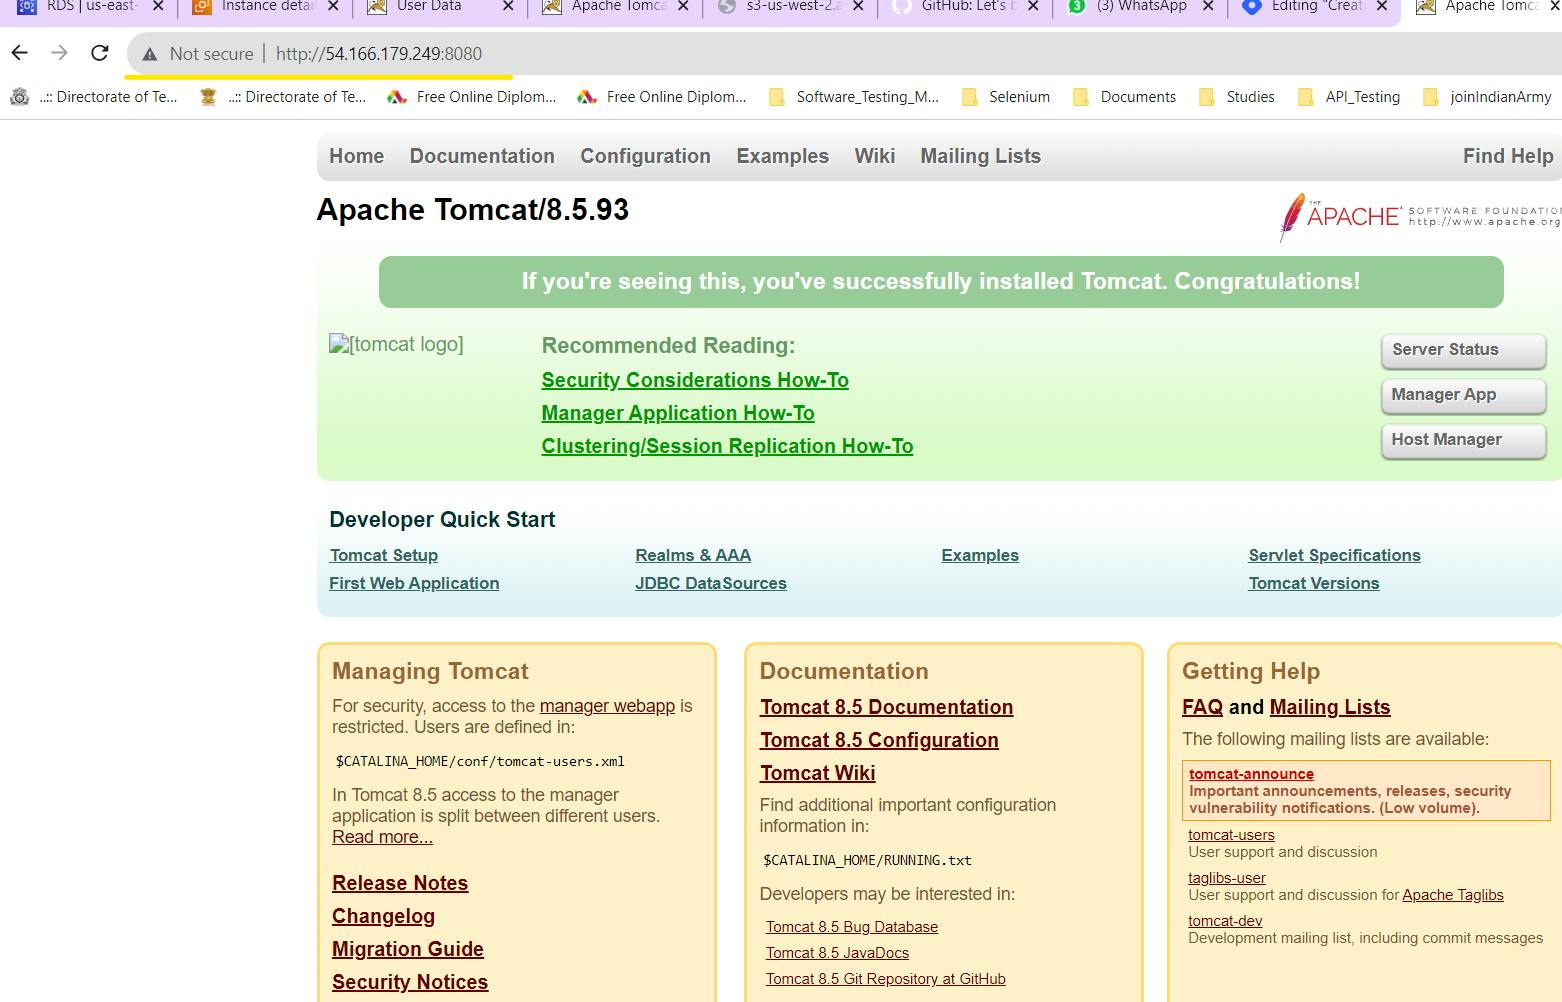
As you can see that the Website-service of tomcat is live and working.
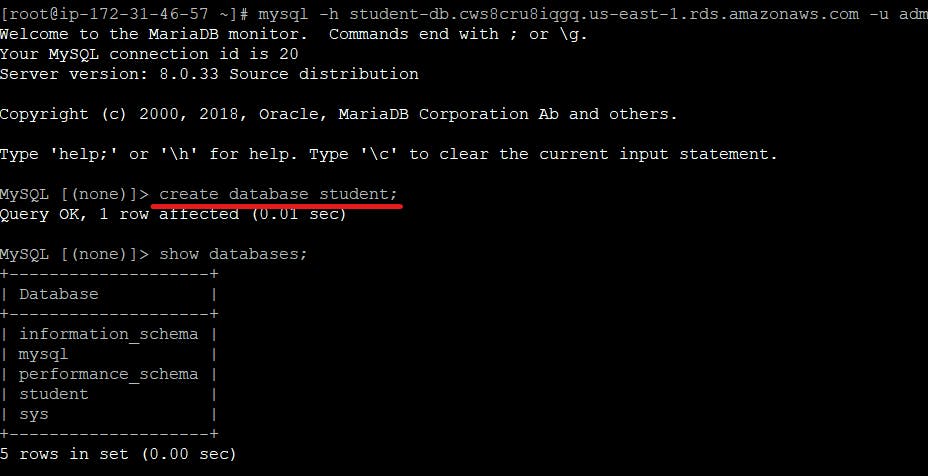
Now what we have to do is create a mysql database --> In that Database create a table for the data to be stored of the student-registration APP.
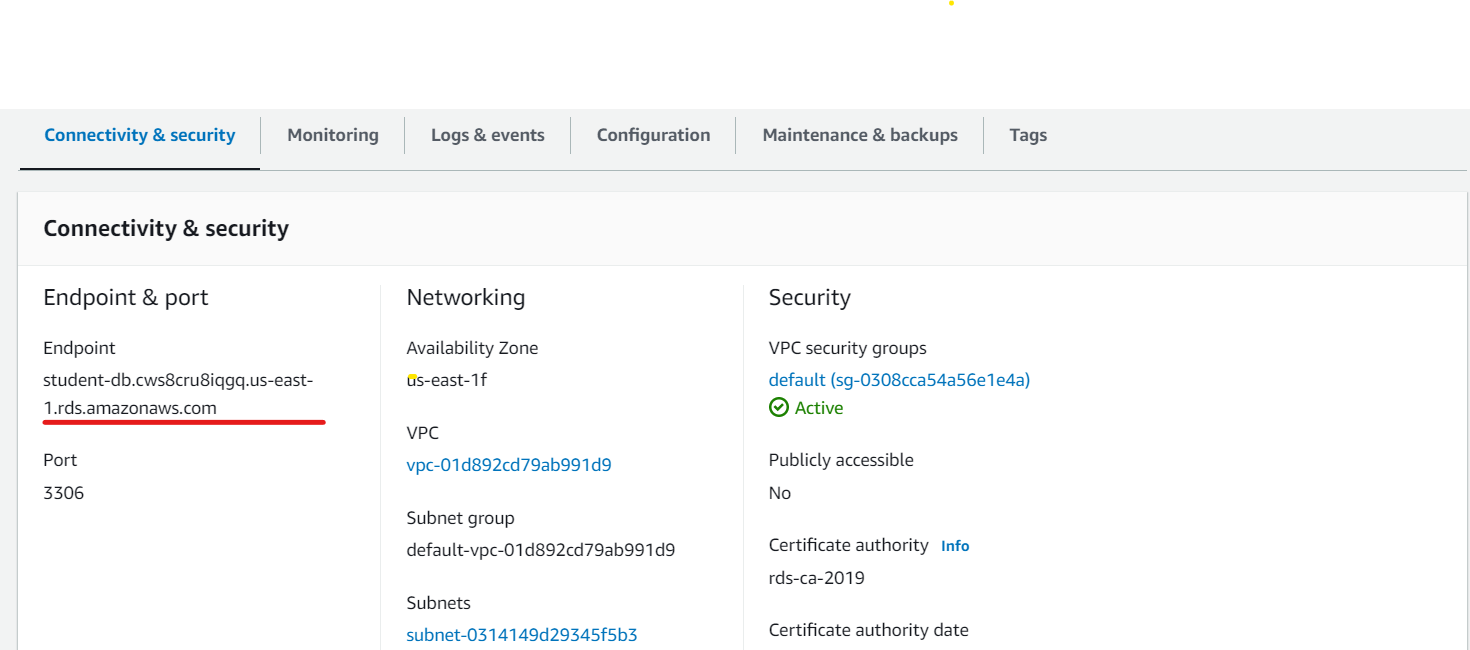
The command to do so is # mysql -h Rds-endpoint -u admin -padmin123
(Note: Here the Admins password of mine is given above As seen Below I have given the end point and the ID and Password give in the same manner )

After this Just create a Database and Also Create a table in the database as shown in the below image.

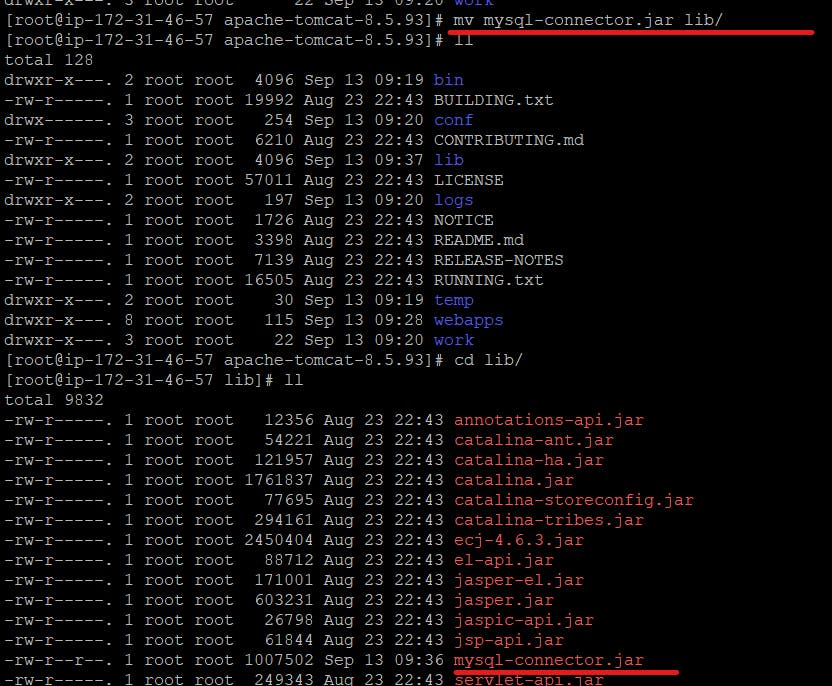
Now we will move to the front end portion of this Project and We will go to the /Opt directory and then Apache Folder and then Type the given command #curl -O https://s3-us-west-2.amazonaws.com/studentapi-cit/mysql-connector.jar 61 ll 62 mv mysql-connector.jar
Then move the following .jar file in the lib/
#mv mysql-connector.jar lib/
As you can see that the .jar file is extracted to the lib/ directory.
After this similarly as above what we have to do is make changes in the webapps/ copy a ".war" file and extract it and mv to the webapps/ folder as shown in the below image.
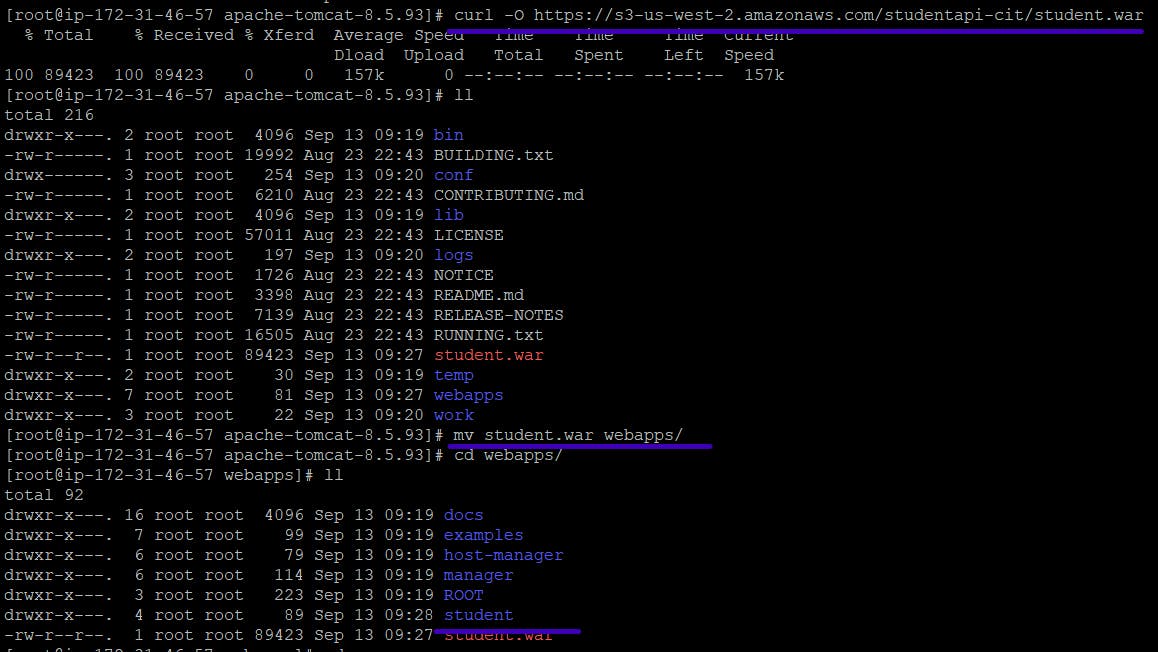
The commands performed above are : #curl -O https://s3-us-west-2.amazonaws.com/studentapi-cit/student.war
After the Url is downloaded to the apache folder now move it to webapps/
command for the following is
#mv student.war webapps/Now it's extracted and stored as students in the webapps/ as underlined in the above image.
We are much closer to complete a 2tier application, The last step to change a configuration folder is #cd conf/
Now go to the conf/ folder and edit the context.xml file and add the mysql-configuration.
Note we will get this Configuration from the below link
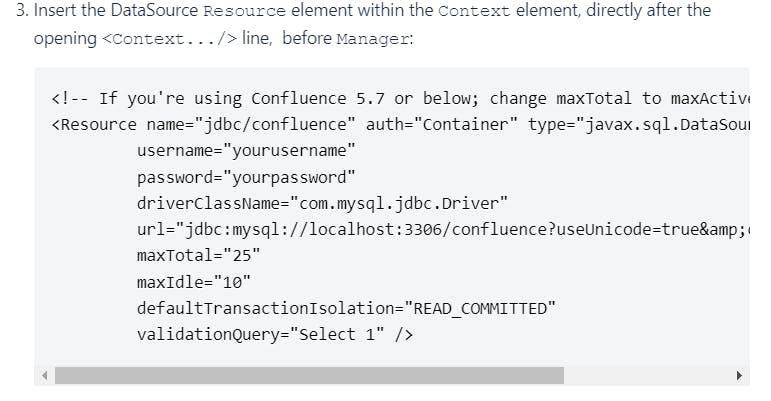
cd conf/
#vi context .xml
Now add the above configuration in context.xml
( Note: yellow : TestDB --Write by default TestDB, Orange : ID and password of the RDs Database as given there, Purple: Rds Endpoint
Green: Database Name
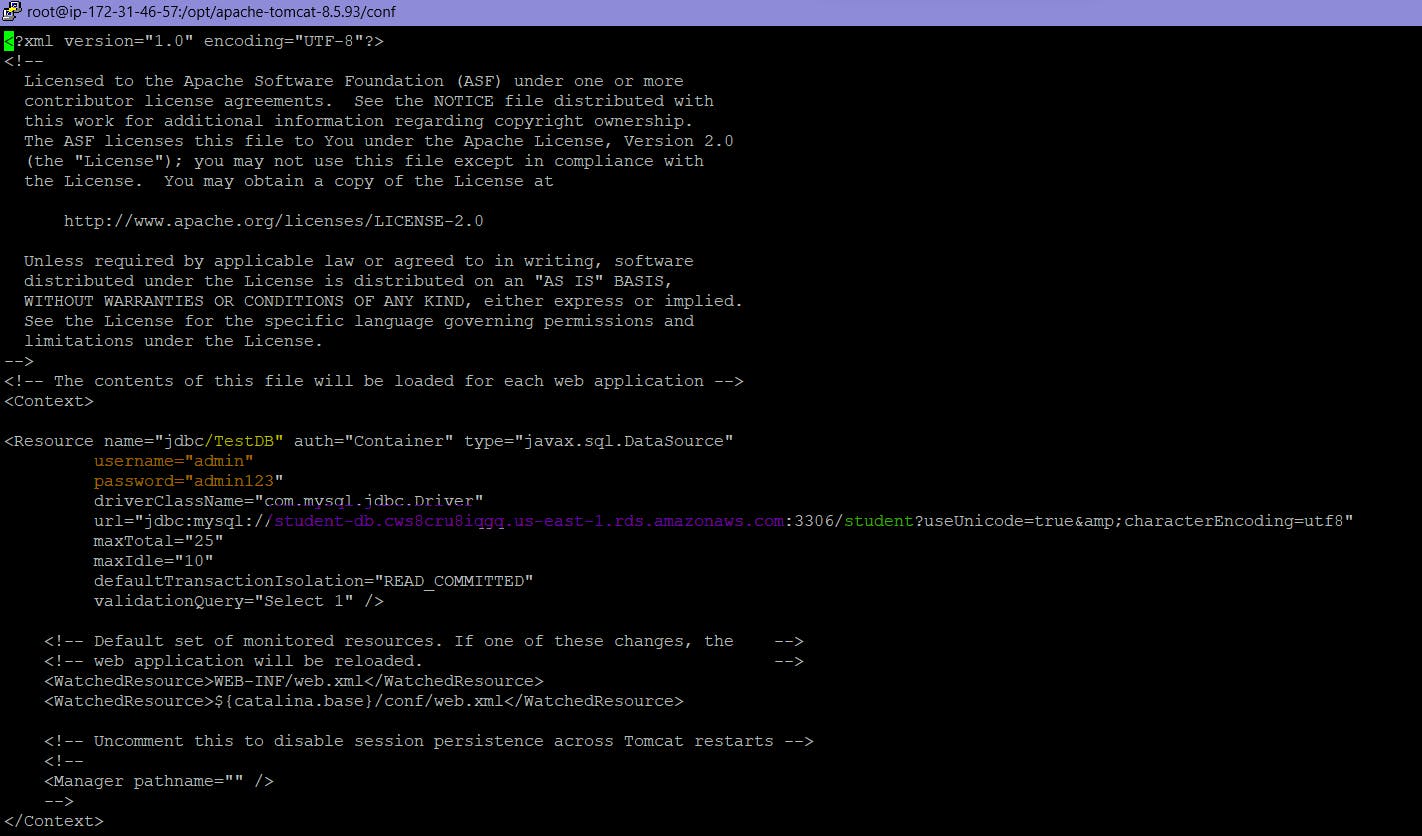
Add the Following and Just #:wq to save and Quit.
Now allow the Port numbers in the security group of both the services
port :3306
port :8080
Now just start and stop the Catalina.sh service of Tomcat to make sure the service is updated.

Now Just go to the google web server and type the public IP
Eg: 192.168.324.33:8080/student
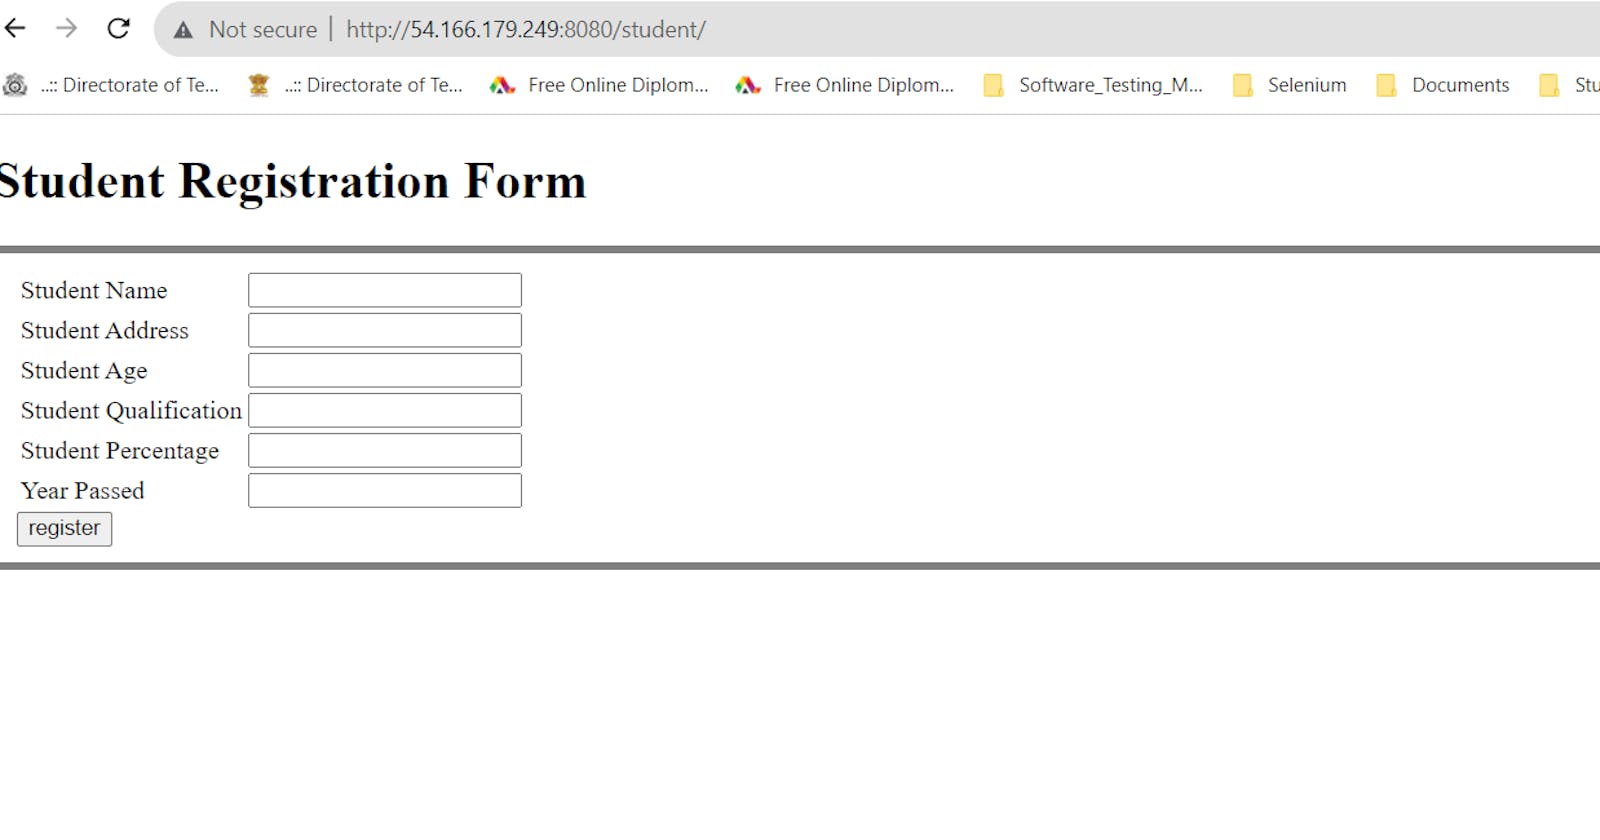
and Hit it you will see that the website is live and add anything to the table and click save it will be saved as following in RDS (Relational Database Service)


As you can see in the above image the data is added and updated to the Database.
Now we will look at the Backend whats the status.
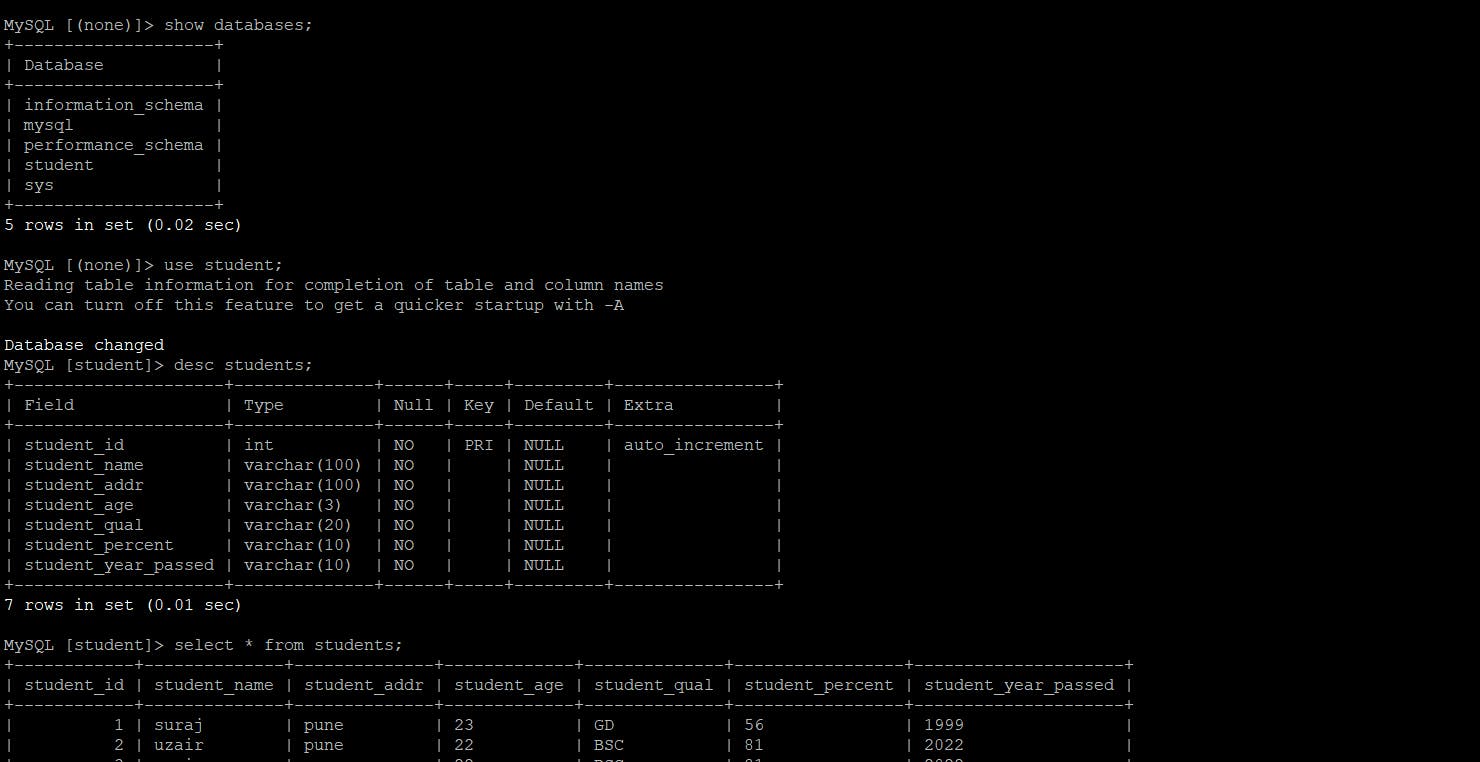
- As you can see that the entry is updated here as we fill up the registration form and save it.
Overview: In the Above project we have an APP Code which is compatible to Mysql and Tomcat web-server to host it, So we have created an instance and installeda the tomcat version and configured it and Similarly at the same time we have created a RDS table, So in the configuration section of Tomcat we will edit 4 folders and perform certain configuration steps in the above project, The 4 files are (bin,conf,webapps,lib) We will create a RDS table and connect that to our application as backend to store the data. For this we will require ports opened and certain links that will be stored in the Git repository
Github repo link : https://github.com/uzair3399/Student-App-Fdec2.git
